|
|
| |
| |
(007) QuickBooks Online - How to Setup, Sync, and Use with 1place
| Author: Steve Childs Reference Number: AA-02809 Created: 2021-08-06 16:16 Last Updated: 2023-11-30 13:18 |
0 Rating/ Voters
|
 |
How the 1place QuickBooks Online (QBO) Syncing Works
Big Picture - How it Works
- If you have an active QuickBooks Online (QBO) account (Plus version or greater if selling Inventory) you can connect to it from inside 1place.
- When the Use QuickBooks Online Integration Features option is set to True, each time an applicable records type (Customer, Item, Invoice, Credit Memo, Invoice Payment, or Purchase Order) is created in 1place the 'To Sync' checkbox (on the new record being created) gets checked automatically. Then when the record is saved you will see a brief sync progress bar as it syncs with QuickBooks Online in real time.
- Each time an applicable record type is added or edited in QuickBooks Online a flag is set in QuickBooks online. Then when the 1place Sync All button is clicked 1place connects to QuickBooks Online and locates the new or changed records in QuickBooks Online and syncs them into 1place.
- You can selectively enable or disable different parts of the syncing process by turning them on and off in the QuickBooks Online Sync screen.
- When a record is 'changed' in 1place the 'Resync' flag gets checked and the changes will be synced when the record is changed.
How 1place Works with QuickBooks Online (Overview of Tasks and Where to Do Them)
|
Function or Data Type |
Tasks Performed
1place |
Tasks Performed in
QuickBooks Online |
Automated Integration
with Quickbooks Online (QBO) |
|
Banking & GL - Chart of Accounts |
|
x |
|
|
Banking & GL - General Ledger |
|
x |
|
|
Banking & GL - Bank Accounts (Checks, Deposits, Adjustments) |
|
x |
|
|
Banking & GL - Online Banking (Integrations) |
|
x |
|
|
Banking & GL - Employee Payroll |
|
x |
|
|
Banking & GL - Financial Reports |
|
x |
|
|
Customers & Prospects - Basic Record |
x |
x |
(auto synced to QBO) |
|
Customers & Prospects - Contact Records |
x |
|
|
|
Customers & Prospects - Additional Details |
x |
|
|
|
Customers & Prospects - Scheduled & Completed Tasks |
x |
|
|
|
Customers & Prospects - Customizable Lists |
x |
|
|
|
Customers & Prospects - Documents (linked to Google Docs & Dropbox) |
x |
|
|
|
Customers & Prospects - Detailed Reports |
x |
|
|
|
Jobs & Projects - Details |
x |
|
|
|
Jobs & Projects - Customizable Fields & Tabs |
|
|
|
|
Jobs & Projects - Customizable Lists |
x |
|
|
|
Jobs & Projects - Detailed Reports |
x |
|
|
|
Items (Parts List) - Basic Record |
x |
|
(auto synced to QBO) |
|
Items (Parts List) - Item Details |
x |
|
|
|
Items (Parts List) - Shipments |
x |
|
|
|
Items (Parts List) - Vendors |
x |
|
|
|
Items (Parts List) - Pricing Tools |
x |
|
|
|
Items (Parts List) - Catalog (Alias Item Numbers & Descriptions) |
x |
|
|
|
Items (Parts List) - Customizable Lists |
x |
|
|
|
Items (Parts List) - Detailed Reports |
x |
|
|
|
Purchase Orders - Basic PO record |
x |
|
(auto synced to QBO) |
|
Purchase Orders - Automated PO Tools |
x |
|
|
|
Purchase Orders - Customizable Lists |
x |
|
|
|
Purchase Orders - Detailed Reports |
x |
|
|
|
Sales - Quotations |
x |
|
|
|
Sales - Sales Orders |
x |
|
|
|
Sales - Invoices |
x |
|
(auto synced to QBO) |
|
Sales - Credit Memo's |
x |
|
(auto synced to QBO) |
|
Sales - Invoice Payments |
x |
x |
(auto synced to QBO) |
|
Sales - Invoice Statements |
|
x |
|
|
Sales - Customer Portal (for Business to Business login to check stock, create Orders, etc) |
x |
|
|
|
Sales - Other 3rd Party E-Commerce Integrations |
x |
|
|
|
Sales - Other 3rd Party system to system integrations (CCC, Partslink, PartsTrader, etc) |
x |
|
|
|
Sales - Detailed Reports |
x |
|
|
|
Sys Admin Tools |
x |
|
|
|
Vendors - Basic Record |
x |
x |
x |
|
Vendors - Contact Records. |
x |
|
|
|
Vendors - Scheduled & Completed Activities. |
x |
|
|
|
Vendors - Customizable Lists |
x |
|
|
|
Vendors - Documents (linked to Google Docs & Dropbox) |
x |
|
|
|
Vendors - Detailed Reports |
x |
|
|
|
Warehouse Management - Pick Ticket Management |
x |
|
|
|
Warehouse Management - Dispatching Deliveries |
x |
|
|
|
Warehouse Management - Stock Transfers (to other warehouses) |
x |
|
|
|
Warehouse Management - osScan (for scanning item counts, and items in and out of stock) |
x |
|
|
Summary of What TO DO in QuickBooks Online
- General Ledger (GL) Management
- Create and maintain 'Chart of Accounts'
- GL Journal Entries
- Banking
- Adding or editing Checks, Deposits, and adjustments to bank accounts in QuickBooks Online
- Syncing QuickBooks Online banks accounts with your banks website version of your bank accounts. This will download new Checks, Deposits, and adjustments directly into the Bank Account in QuickBooks Online.
- Accounts Payable (AP)
- Entering & Paying AP Bills. Note: Users can create AP Bills when using 1place Purchases Orders.
- Printing Financial Reports (Balance Sheet, Profit/Loss (Income Statement), Statement of Cash Flows)
- Payroll (if desired)
What does NOT sync with QuickBooks Online
The follow types of information do NOT sync with QuickBooks Online (because there is no place in QuickBooks Online to store the information):
- Certain Customer record fields (where no applicable field exists in QuickBooks Online).
- Customer Contact records (related to Customers and Vendors)
- Certain Vendor record fields.
- Certain Item record fields.
- Item Receipts (from PO Line Items received)
- Item Vendor records
- Item Price Levels
- Item Search Catalog
- Quotations
- Sales Orders
- Shipping / Receiving (To Pick, Picking, To Dispatch, In Route, etc)
A Few Known Imperfections in the QuickBooks Online to 1place (API) IntegrationPease read this kba article. What if I Want to Use QuickBooks (Online or Desktop) Completely Separate (and Never Use the Syncing feature for QuickBooks Online)?1place has been designed to sync with QuickBooks Online to save a LOT of time and eliminate a lot of hassles. If you do NOT use the SYNCING feature this is the extra work you will have to do: - Tracking Banking
- You will need to receive payments from Customers in 1place and then either (1) make an Invoice in QuickBooks Online (QBO) and receive the payment against it too, or (2) just make a random deposit into your bank account.
- Tracking Accounts Payable (A/P)
- You will need to manually create AP Bills for POs entered and received into 1place. This will make your inventory value (on balance sheet) increase, but with no syncing Invoices it will not decrease.
- Tracking Accounts Receivable (A/R)
- If a customer pays your $1,000 check for 10 invoices you will have to open up each invoice in 1place to receive part of the $1,000 payment for each. (Also, If you try to sync these partial payments into QBO some time later on they will not sync properly).
- (Until toward end of 2022 you CANNOT send Customer Statements from 1place. You must send Statements from QuickBooks. So, in order to send Statements you will need to re-enter every Invoice into QBO).
- Tracking Your Financials (Profit & Loss, Balance Sheet)
- If you do not SYNC or HAND ENTER every single Invoice, with all line items, the INVENTORY valuation on Balance Sheet will NOT adjust back down. Also, the COST OF GOODS on Balance Sheet will NOT adjust up. So your Balance Sheet AND Profit/Loss will be incorrect.
Which Version of QuickBooks Online is best for 1place?
- NOTE: 1place does NOT work with ANY of the downloadable / desktop versions QuickBooks.
- If your business DOES SELL inventory items then you can purchase the Plus or Advanced versions of QuickBooks Online.
- (Note: The Plus version will more than likely meet your needs just fine).
- If your business does NOT sell inventory then you can purchase the Simple Start or the Essentials version of QuickBooks Online.
Preparing QuickBooks Online for Syncing with 1place
Setting Up Your Chart of Accounts
- Log into your QuickBooks Online Account.
- Click Accounting (on the left menu bar).
- Compare the default Chart of Accounts with the Chart of Accounts you have used in OneSource (or any other accounting system).
- Click the New button to add any additional Accounts to match your previous accounting system.
- In order to Sync with 1 place, but sure to have the following accounts set up:
|
Account Type |
Detail Type |
Account Name |
Account Number |
Notes |
|
Accounts Receivable (A/R) |
Accounts Receivable (A/R) |
Accounts Receivable (A/R) |
(Optional) |
--This account will be used when you create a new Invoice (on the 1place Invoice screen) to track how much the customer still owes you.
--When you sell a part, this is the (asset) amount that will be increased on your Balance Sheet Accounts Receivable account. |
|
Other Current Assets |
Inventory |
Inventory |
(Optional) |
--This account will be used when you create a new Invoice (on the 1place Invoice screen) to track the COST of the item or part you sell.
--When you sell a part, this is the (asset) amount that will be reduced from your Balance Sheet Inventory account.
--This account is also used when you create an AP Bill (from the 1place Purchase Order screen) to track the increase of inventory value.
--When you buy a part, this is the (asset) amount that will be increased on your Balance Sheet Inventory account. |
|
Other Current Assets |
Undeposited Funds |
Undeposited Funds |
(Optional) |
--This account will be used when you receive a payment (on the 1place Invoice or Sales Order screens) to track money received, but not yet physically (or virtually) deposited into your bank account.
--When you receive a payment, this is the (asset) amount that will be increased on your Balance Sheet Undeposited Funds account. |
|
Accounts Payable (A/P) |
Accounts Payable (A/P) |
Accounts Payable (A/P) |
(Optional) |
--This account will be used when you create a new AP Bill (from the 1place Purchase Order screen).
--When you buy a part, this is the (liability) amount that will be increased on your Balance Sheet Accounts Payable account (until you pay for it). |
|
Other Current Liabilities |
Other Current Liabilities |
Sales Order Deposits |
(Optional) |
--This account will be used when you receive a payment on a Sales Order (on the 1place Sales Order Payment screen) to track how much money you have collected from the Customer (before delivering any goods or services to the Customer).
--When you receive a payment, this is the (liability) amount that will be increased on your Balance Sheet Sales Order Deposits account. |
|
Income |
Sales or Product Income |
Sales |
(Optional) |
--This account will be used when you create a new Invoice (on the 1place Invoice screen) to track the Total Amount of the Sale of the Item.
--When you sell an part, this is the (sales) amount that will be increased on your Profit & Loss (Income Statement) Sales account. |
|
Cost of Goods Sold |
Supplies & Materials |
Cost of Goods Sold |
(Optional) |
--This account will be used when you create a new Invoice (on the 1place Invoice screen) to track the COST of the item or part you sell.
--When you sell a part, this is the (expense) amount that will be increased on your Profit & Loss (Income Statement) Cost of Goods Sold account. |
|
|
|
|
|
|
===================== |
===================== |
===================== |
|
|
Be sure to have the following If necessary, If necessary add additional Accounts
Setting Up Payment Terms
- Log into your QuickBooks Online Account.
- Click Gear (icon in top right corner) > All lists > Terms.
- Set up any desire payment terms you want to sync into 1place.
Setting Up Payment Methods
- Log into your QuickBooks Online Account.
- Click Gear (icon in top right corner) > All lists > Payment Methods.
- Set up any desire payment methods you want to sync into 1place. (These are used by 1place, but are not required).
Setting Up Locations (to differentiate your Warehouses - if you have more than 1 warehouse)
- Log into your QuickBooks Online Account.
- Click Gear (icon in top right corner) > All lists > Locations.
- Click New to add a new Location for each Warehouse you want to track individual Sales.
Other Things to Set (before or after you connect QuickBooks Online to 1place)
- Create a Bank Account (GL Account) for each of your company's Bank Accounts.
- (If desired, and highly recommended) Set up syncing between QuickBooks Online and your Banks website version of your account.
- Create 1 or more Beginning Balance Journal Entries to make your Balance Sheet accurate, as of the first of the year and/or as of the end of the month before you started using 1place.
How to Connect 1place with QuickBooks Online (to Sync)
When to Turn on The QuickBooks Online Syncing
VERY IMPORTANT NOTE: Using the 1place interface (and working with OneSource Software tech support) virtually ANYTHING can be deleted from 1place. However, certain types of records in QuickBooks Online (Customers, Vendors, Items, etc) cannot be deleted. If you delete or deactivate them in 1place then can be deactivated (hidden) in QuickBooks Online but can never be deleted. This being the case we highly recommend NOT syncing Customers, Vendors, Items, Invoices, and PO's with QuickBooks Online until such time that you are ready to GoLive.
If you want to TEST the QuickBooks Online syncing processes you can follow these steps to selectively sync records:
- Open the QuickBooks Online Sync Center.
- Make sure the Use QuickBooks Online (QBO) Integration Features checkbox is CHECKED.
- Make sure all 5 of the Sync With QuickBooks Online record types are UNCHECKED. This will automatically UNCHECK the TO SYNC checkbox when making new Customers, Items, etc
- Selectively add 1 or more Test Customers, Vendors, Items, Invoices, and POs.
- Before saving the new (or changed) Test records manually CHECK the To Sync checkbox and then save the record.
- Check for the newly added or changed records in QuickBooks.
- When finished performing your syncing test DELETE the records you created in 1place and UNCHECK the Use QuickBooks Online (QBO) Integration Features option in the QuickBooks Online Sync Center in 1place.
How to Check the 1place / QuickBooks Online connection state
- Click the
 icon to open the QuickBooks Online Sync Center. icon to open the QuickBooks Online Sync Center. - If 1place IS NOT connect to QuickBooks Online it will display a popup screen that look like the screen below:
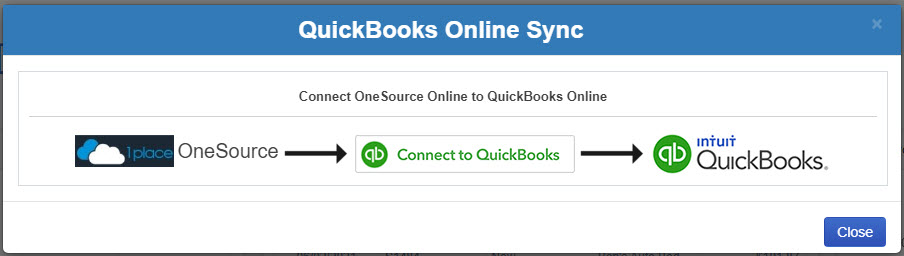 - To CONNECT QuickBooks Online to 1place just click on the green Connect to QuickBooks button and follow the steps to enter you QuickBooks Online login username and password.
- After you have connected the screen will enlarge to show many additional settings and will also, most likely, receive a confirmation email from QuickBooks / Intuit.
- If 1place IS already connected to QuickBooks Online it will display a large screen with many settings and you will see a GREEN BAR across the top of the screen which reads: 1place is connected to QuickBooks Online.
How to Open the QuickBooks Online Sync Center screen
- Click on the icon (on the left menu bar).
How to Turn the QuickBooks Online Syncing On and Off
- Click on the icon (on the left menu bar) to open the QuickBooks Online Sync Center.
- In the QuickBooks Online Integration section there is a setting to enable or disable the Syncing mechanism.
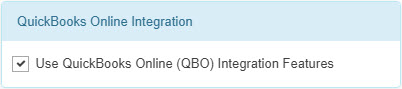
- To turn the Sync ON: CHECK the 'Use QuickBooks Online (QBO) Integration Features'.
- To turn the Sync OFF: UNCHECK the 'Use QuickBooks Online (QBO) Integration Features'.
How to Make Certain Modules Require Manual Syncing
- Click on the icon (on the left menu bar) to open the QuickBooks Online Sync Center.
- When the 'Use QuickBooks Online (QBO) Integration Features' IS CHECKED, 1place will Sync newly added or edited (applicable type) records when the RED Save or Commit buttons are clicked AND the 'To Sync' or 'Resync' checkbox is checked.
- 1place will automatically place a CHECK in the To Sync checkbox on all new (applicable type) records when the following checkboxes are checked:
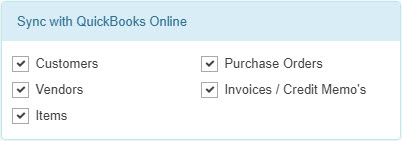
- Put another way, if any of the checkmarks above are UNCHECKED then when new records of that type are created the To Sync will NOT be auto checked. If you want to sunc that record you will need to manually select the To Sync checkbox.
How to Setup New Item Defaults
- Prerequisites: Be sure to complete all applicable items in the section above called Preparing QuickBooks Online for Syncing with 1place.
- Click on the icon (on the left menu bar) to open the QuickBooks Online Sync Center. Then locate the section called Set Default Account & Item Type:
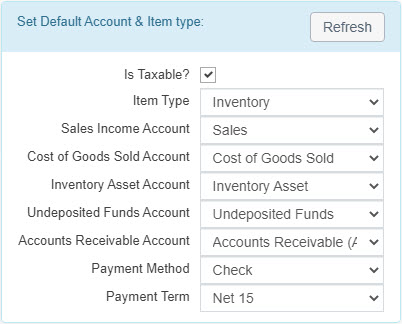
- When a new Item is manually added (or imported) into 1place the following Defaults are used to auto fill in certain fields for the new item (to make sure the item will sync correctly with QuickBooks Online):
- Is Taxable sets the item to be Taxable. It is a good idea to set this to True. If a Customer is set to Tax Exempt none of the items on an Invoice will be taxed for that Customer.
- Item Type.
- If you primarily sell tangible items set this default value to Inventory. (This will enable 1place and QuickBooks Online to track the inventory levels for the item).
- If you primarily sell services set this default value to Service.
- Sales Income Account. Select the Sales account you created in QuickBooks Online.
- Cost of Goods Sold Account. Select the Cost of Goods Sold account you created in QuickBooks Online.
- Inventory Asset Account. Select the Inventory account you created in QuickBooks Online.
- Undeposited Funds Account. Select the Undeposited Funds account you created in QuickBooks Online.
- Sales Order Deposits Account (not shown in picture above). Select the Sales Order Deposits account you created in QuickBooks Online.
- Accounts Receivable Account. Select the Accounts Receivable account you created in QuickBooks Online.
- (Optional) Payment Method. Select a default Payment Method you created in QuickBooks Online. If desired, you can leave this field blank.
- (Optional) Payment Term. Select a default Term you created in QuickBooks Online. If desired, you can leave this field blank.
Converting QuickBooks (Desktop Version) to QuickBooks Online (Cloud Version
Learning How to Use QuickBooks Online
- Hector Garcia - CPA - (QuickBooks Guru)
- Intuit / QuickBooks Online
Exporting & Importing QuickBooks Online Data
How to Export QuickBooks Online Customers, Vendors, Items, Invoices, and Purchase Orders
- See the GREEN section above for details about how to connect 1place to QuickBooks Online to SYNC all of these record types between 1place and QuickBooks Online.
How to Export QuickBooks Online (QBO) List IDs
If you are importing data from an older system into 1place and you want the Payment Terms and Payment Methods and Location (warehouse) to sync properly with QuickBooks Online you will have these 2 options:
- Option 1: Make sure the Payment Terms, Payment Method, and the Warehouse has the identical spelling as the equivalent values in QuickBooks Online. When using the 1place Import Wizard it will convert the value to the proper QBO LIST ID in QuickBooks Online.
- Option 2: Export a list of QBO LIST IDs from 1place (after you have establish the connection between 1place and QuickBooks Online) by following these steps:
- Open the QuickBooks Online Sync Center in 1place.
- In the section called 'Download All QuickBooks Online Supporting Lists' click on the Download button. This will download all QuickBooks Online List IDs in an Excel file. Insert the proper list ID for each Payment Term, Payment Method, and Location (Warehouse) in the proper column on the Excel files you plan to import into 1place. This will assure that the proper values get synced correctly in QuickBooks Online.
How to Export QuickBooks Online CUSTOM fields
- Notes about QuickBooks Online Custom fields (as of 9/4/21).
- Most versions of QuickBooks Online allows for the creation of 3 custom fields.
- QuickBooks Online Advanced allows for up to 12 fields. HOWEVER, as of this writing, the QuickBooks API does NOT provide a way to SYNC data to or from the custom fields.
- Due to the inconsistency we do NOT have a way to automatically sync QuickBooks custom fields into 1place. You will need to follow the steps below to export and import the data semi-automatically.
- Follow these steps to EXPORT your QuickBooks Online Custom fields:
- From the Reports menu, select Customers & Receivables.
- Select Customer Contact List.
- At the top left, click Customize Report.
- From the Display tab, put a check mark next to each custom fields you wish to export under COLUMNS.
- Click OK.
- Follow these steps to export Custom fields for Vendors & Payables
- From the Reports menu, select Vendors & Payables
- Select Vendor Contact List.
- At the top left, click Customize Report.
- From the Display tab, put a check mark next to each custom fields you wish to export under COLUMNS.
- Click OK.
How to Import QuickBooks Online CUSTOM fields into 1place
|
| |
|
|

