| |
| |
List Screens - How To's
| Author: Steve Childs Reference Number: AA-02787 Created: 2021-05-24 16:13 Last Updated: 2024-06-22 15:29 |
0 Rating/ Voters
|
 |
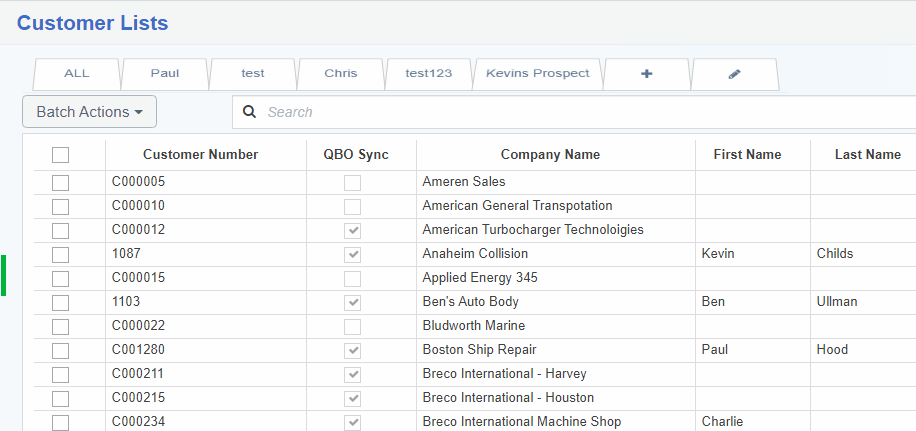
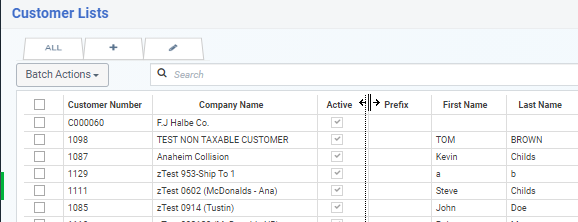
Help TopicsA 'List' screen has been created for each of the major types of Records in OneSource. The purpose of List screens is to be able to easily work with batches of records in the following ways: - See a list of all records of a particular type, such as Customers, Vendors, Invoices, etc.
- Find records by keyword.
- Create new 'tabs' of records pre-filtered to the set of records that meets your criteria (called 'custom tabs').
- Add new records - one at a time.
- Add new records - by importing from a spreadsheet.
- Export records out of OneSource.
- Customize the screen design.
- Getting Help
- Click on a menu item on the left side of the screen to see a 'List' of records of that type.
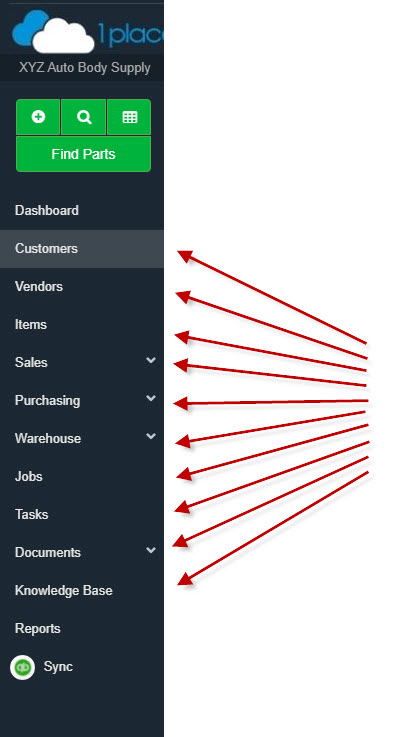 - Click on the Customers menu option (on the left) to display a list of Customers.
- Click on the Vendors menu option (on the left) to display a list of Vendors.
- Etc...
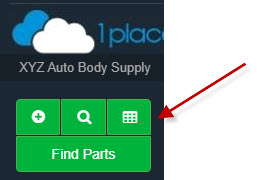
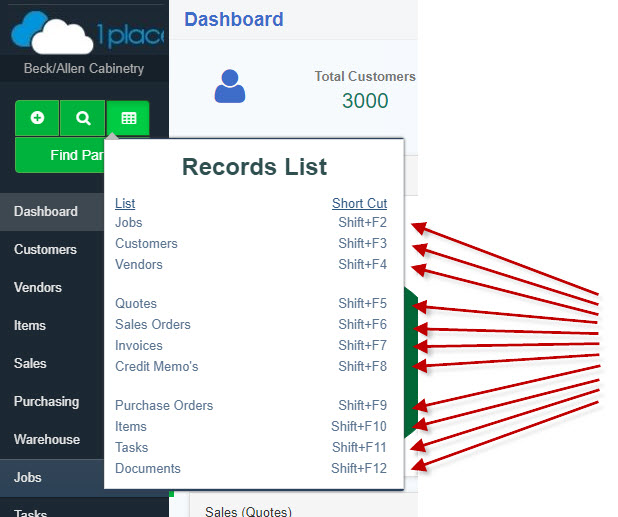
- Or, Quick Access Keys - List button (in the upper left hand corner)
- Or, Shortcut Keys
- SHOW OR HIDE COLUMNS: Click on the gear icon
 to view a list of columns that can be made visible or invisible. to view a list of columns that can be made visible or invisible.
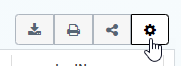
- MOVE COLUMNS: After clicking the gear icon click on the 'Enable Column Repositioning' button to turn on the mode to allow you to click and drag columns to any position. (Close the screen to get back out of that mode).
- RESIZE COLUMNS: Position your mouse in between 2 columns to reveal the option to resize any column.
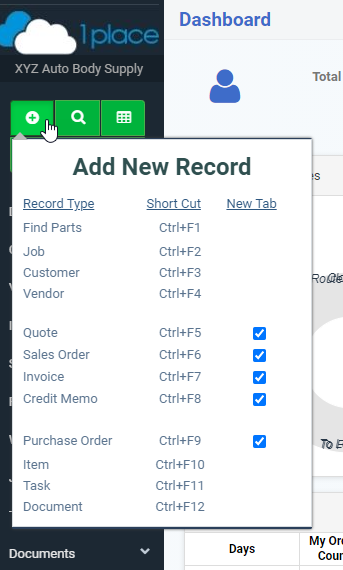
- Click on the green plus icon
 on the top nav bar then select the type of record that you want to add. Shortcut keys are also provided for a quicker method (as shown below). on the top nav bar then select the type of record that you want to add. Shortcut keys are also provided for a quicker method (as shown below).
- Or, Click on the 'New' button
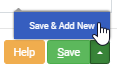
 (lower left part of the screen) to add a new record of a particular type. This will display the 'Add New' screen (for that particular type of record). (lower left part of the screen) to add a new record of a particular type. This will display the 'Add New' screen (for that particular type of record). - Fill out the necessary information and click 'Save'.
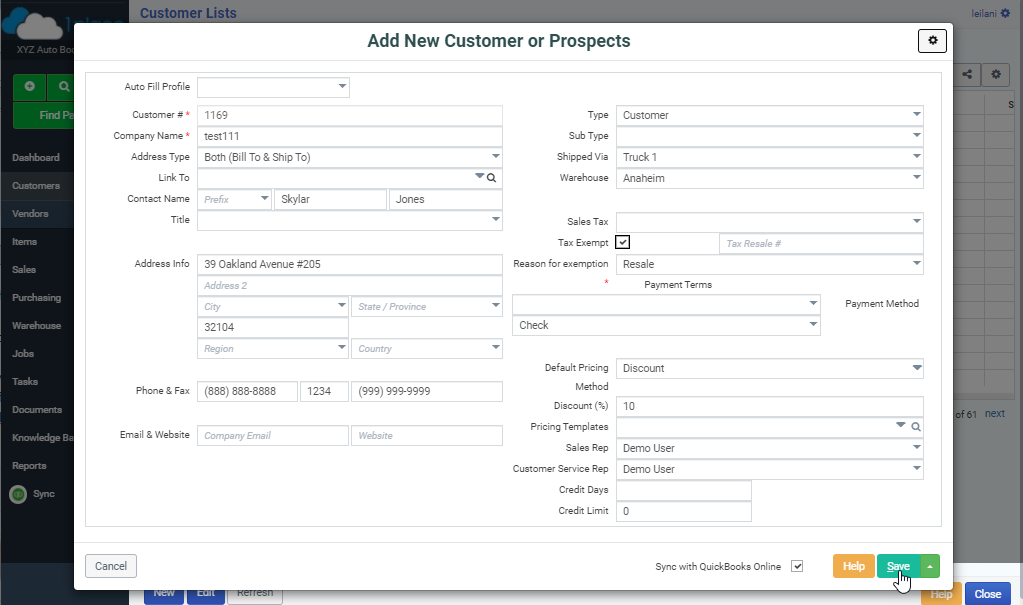
- Click the drop up button and click 'Save and Add New' if opting to add another new record.
- Click on the arrow up icon
 (upper right corner of the screen) to import records of a particular type. This will display the 'Import Wizard' screen. (upper right corner of the screen) to import records of a particular type. This will display the 'Import Wizard' screen.
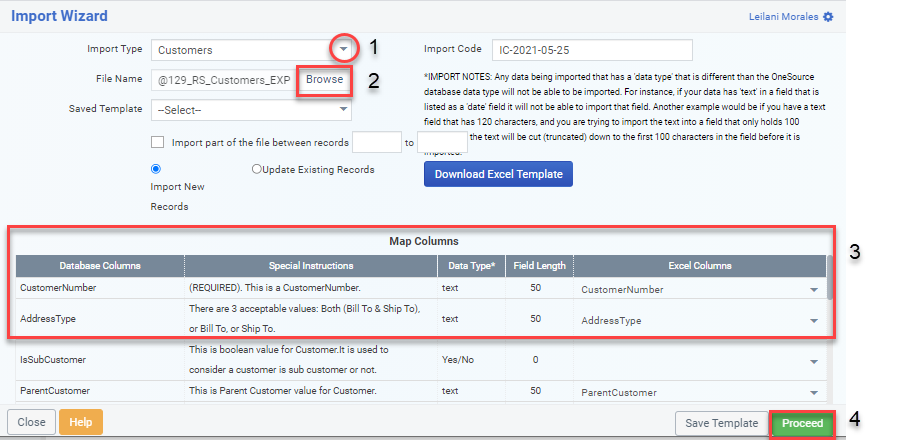
- On the Import Wizard screen:
- (1) Click on the drop down arrow and select the Import Type.
- (2) Click on the browse button to select the file location of the particular File Name of the record/s to be imported.
- (3) The Import Wizard has the ability to auto map the columns with the same Field/Column names listed on your Excel files. If the file Field/Column names do not match, manually map by using the drop down arrow (under the Excel Columns) then select the file that you wish to match with the Database Columns.
- (4) Click 'Proceed'. A pop-up message will be displayed when import has completed.
- *Note: (..will contain explanation for the 'Saved Template', Import New Records, etc...)
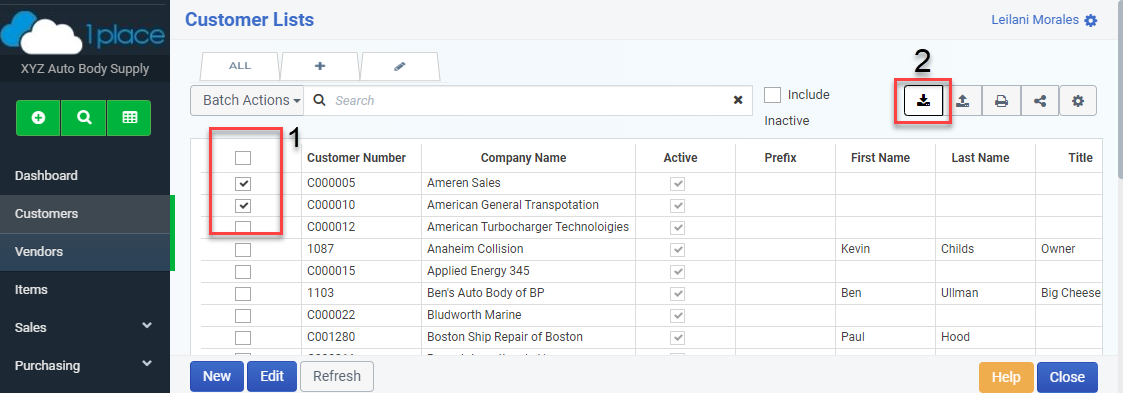
- (1) Select (by checking the box/es on the left side) the item record/s to be exported. *Note: You can click on the first box (on the Field Names row) to select ALL item records on the entire page or list.
- (2) Click on the arrow down icon
 (upper right corner) to export the selected records of a particular type. (upper right corner) to export the selected records of a particular type.
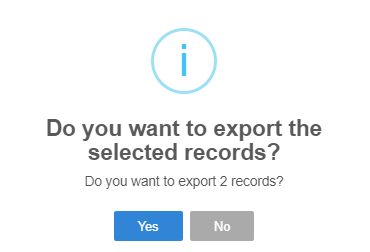
- A pop-up message will be displayed for confirmation. Click 'Yes' to proceed.
- An excel file will be downloaded and shown on the lower left part of the screen. Click this to view the exported file.
- To be able to use this function, make sure to download the 'OneSourcePrinterConnectApp'. Go to this article for instructions.
- Click on the print icon
 (upper right corner) on the display screen of a particular type. (upper right corner) on the display screen of a particular type.
- Click on the 'Plus' icon
 to add a new 'Custom' tab. This will display the 'New Tab Wizard' screen. to add a new 'Custom' tab. This will display the 'New Tab Wizard' screen. - Type in your preferred Tab Name and choose the Field Sources that you wish to display. You may edit Field Name and choose Filter Conditions according to your needs.
- Click 'Save'.
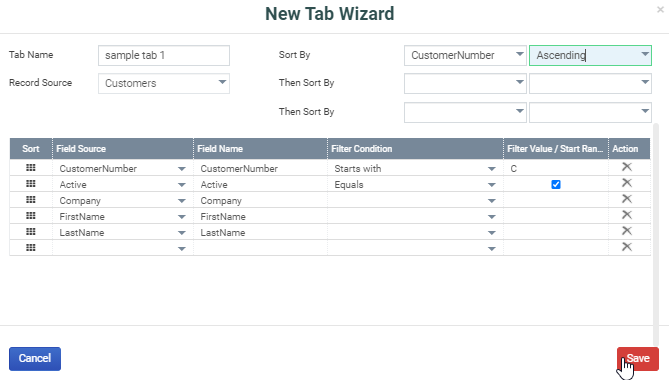
- Note: Customized Tabs will only be saved in OneSource Cloud copy of the particular User and NOT for ALL users.
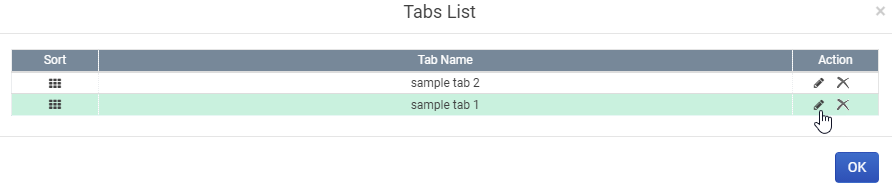
- Click the 'Pencil' icon
 on the list screen to display the Custom 'Tabs List'. on the list screen to display the Custom 'Tabs List'. - Under the 'Action' column, Click the 'Pencil' icon to edit or the 'X' icon
 to delete the selected (highlighted row) Custom Tab. to delete the selected (highlighted row) Custom Tab.
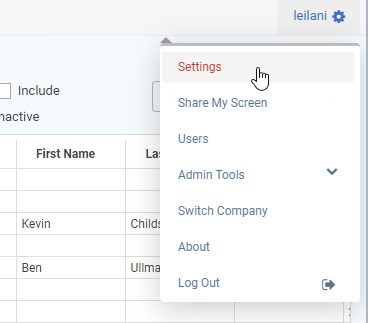
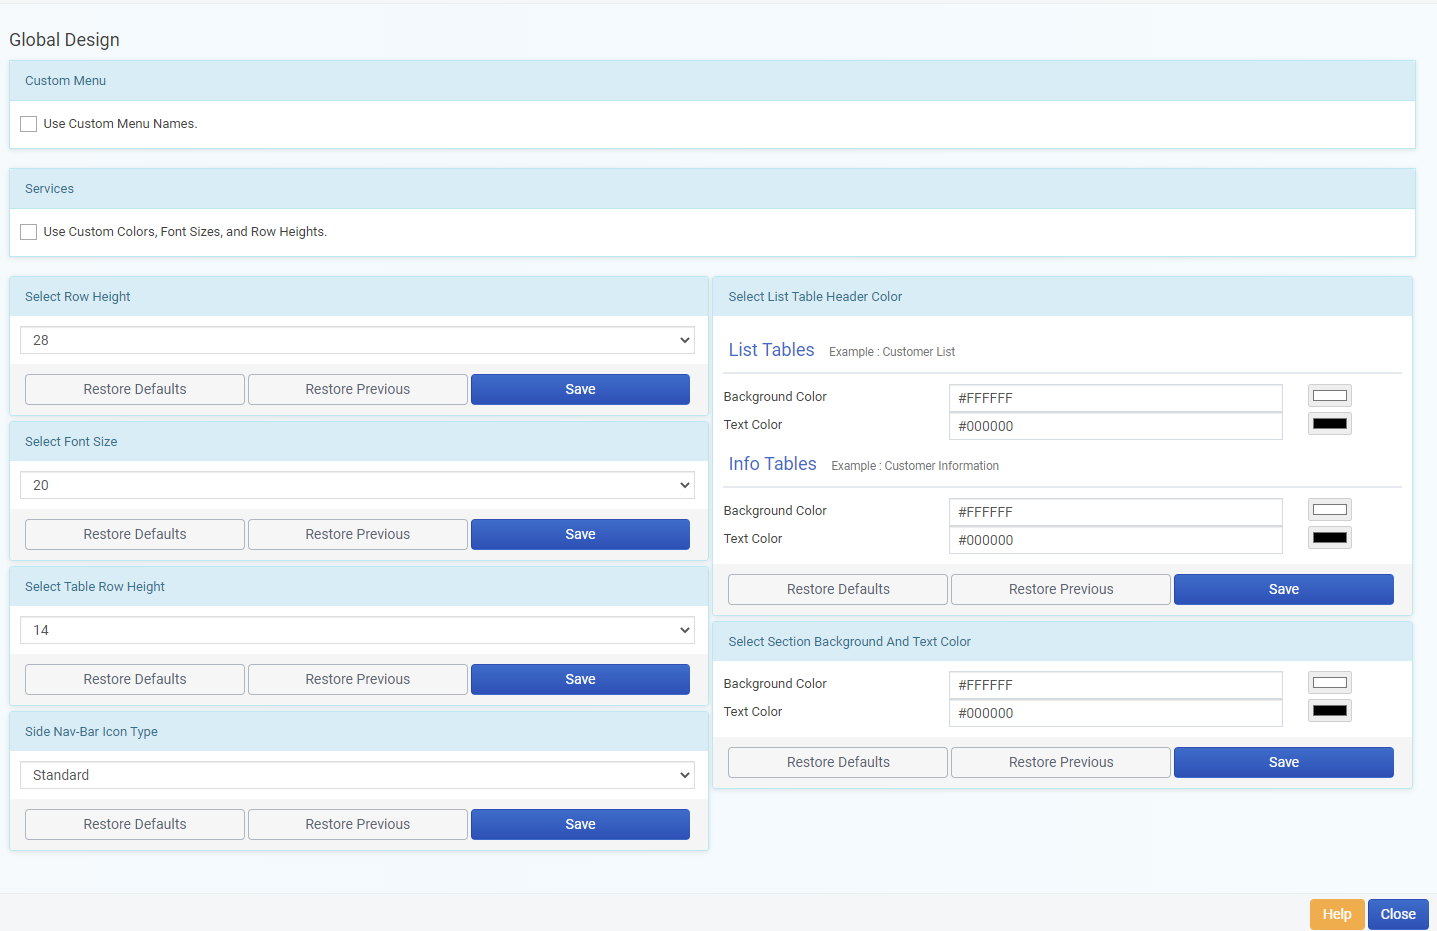
OneSource has added several User Interface Design options to improve usability, user experience and the aesthetic appeal of the whole design. To customize design according to your preferences: - Click on the gear icon (at the top right corner) then choose 'Settings'.
- Click on the drop-down arrow under 'System' then choose 'Custom UI Design'.
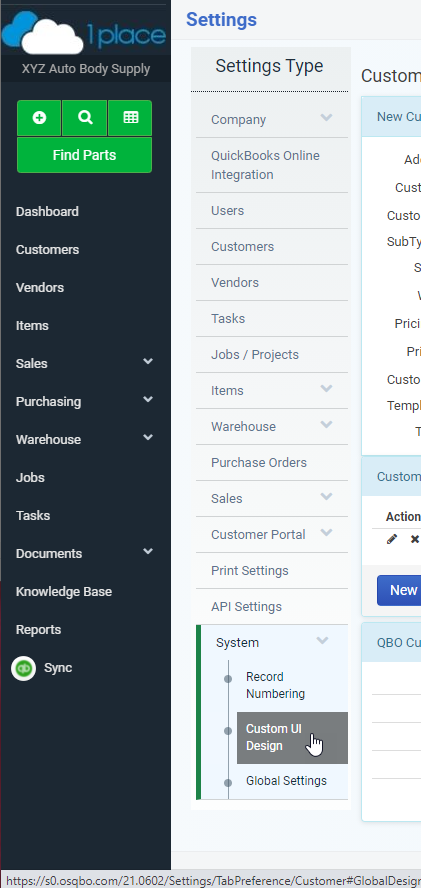
- The 'Global Settings' screen will be displayed and you may now select preferred font sizes/styles, background colors etc as seen below. Click 'Save'.
OneSource has been designed to be simple, functional and convenient for user's seamless experience. Additionally, self-help articles are also provided per topic. - 'HELP' BUTTONS
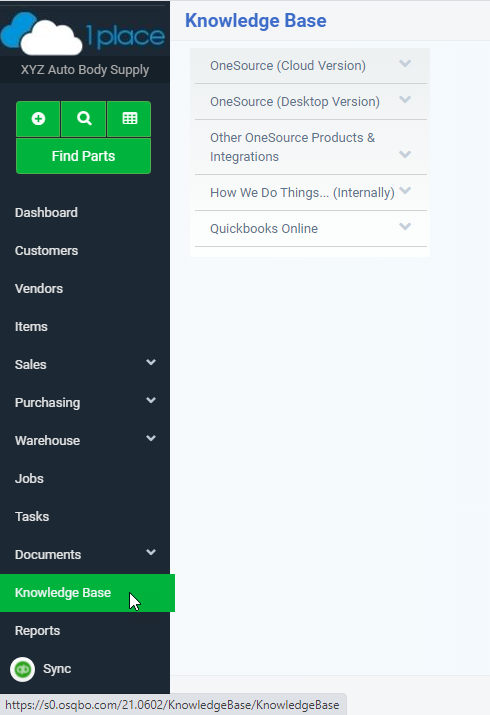
 are placed on majority of the screens that will lead to help topics related to the features and functions on specific screens. are placed on majority of the screens that will lead to help topics related to the features and functions on specific screens. - KNOWLEDGE BASE ARTICLES: Click 'Knowledge Base' on the left navigation bar to display the main topics and sub-topics of various self-help articles.
- SEND AN EMAIL: Send your query to support@onesourcesoftware.com to get answer to your concern/s.
- CONTACT ONESOURCE: Talk to a live tech support agent at 1 (801) 748-4804
- CREATE A TICKET: Go to https://onesourcesoftware.com/home/support/
- REMOTE ASSISTANCE: Go to https://onesourcesoftware.com/home/support/
|
| |
|
